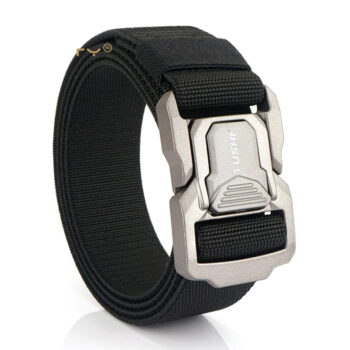
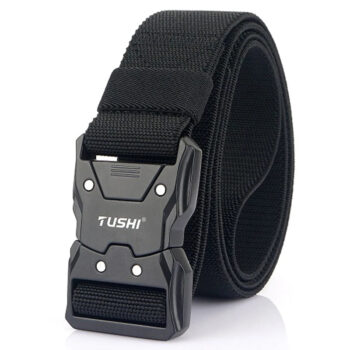
Tactical belts — canvas, nylon, and elastic — are sold in universal lengths of 120–160cm. Almost every buyer needs to trim them. The process is simple but differs by material: leather trimming (covered in the ratchet belt resizing guide →) uses scissors only. Canvas and nylon require one additional step: sealing the cut edge with heat to prevent fraying.
Skip the heat-seal step on canvas or nylon and the cut edge will fray within days of wear. The fibres unravel from the cut point and work their way up the strap. This is not a product defect — it is what cut synthetic and woven material does without edge treatment.
This guide covers the trimming process for canvas, nylon, and elastic tactical belts, including the heat-seal step.
Optional:
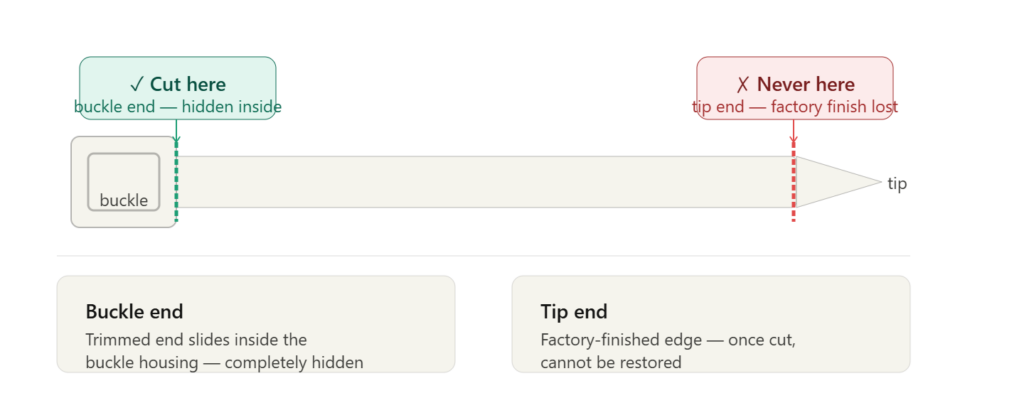
Always cut from the buckle end — never the tip end.
The tip end is the finished end of the strap — it has a clean factory edge, often reinforced or folded. Once you cut the tip end, that factory finish is gone and cannot be restored.
The buckle end is hidden inside the buckle housing when the belt is worn. A cut at this end is concealed completely. This is where all trimming happens regardless of belt type.
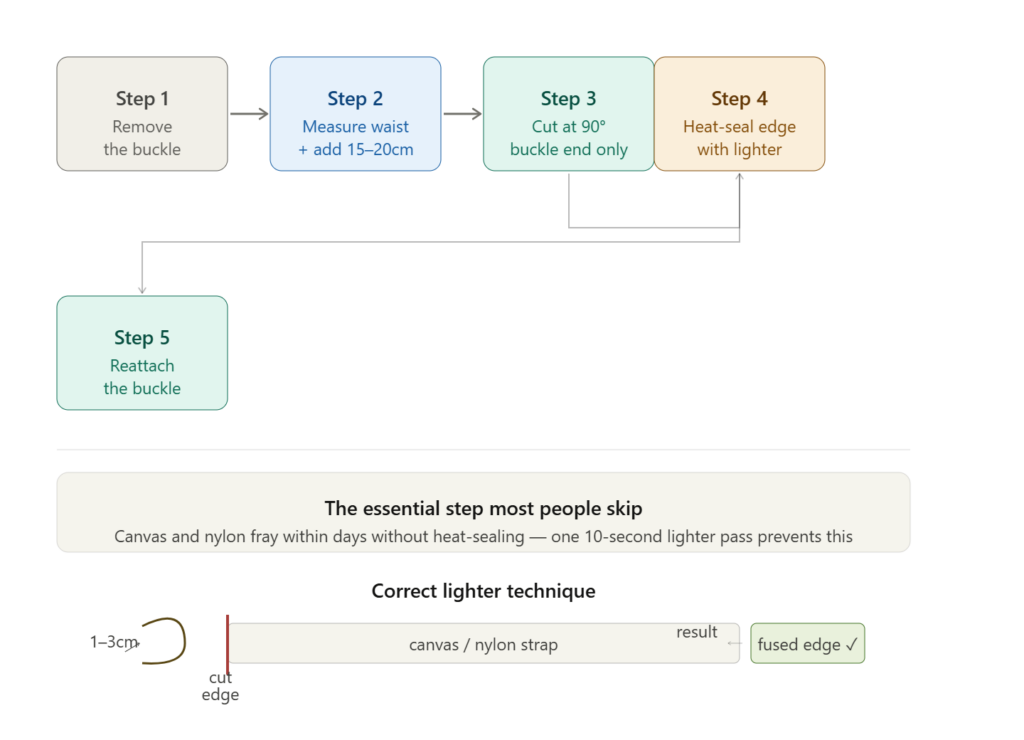
Canvas is a woven textile — the weave structure means cut edges fray immediately unless sealed. The lighter-seal step fuses the woven fibres at the cut point and prevents unravelling.
Step 1 — Remove the buckle
Open the rear clamp or release mechanism on the buckle. Slide the canvas strap out of the buckle housing. Set the buckle aside.
Step 2 — Measure your required length
Measure your waist at belt loop level. Add 15–20cm for the buckle overlap. Mark this total length on the back of the strap from the buckle end using a pen or marker. This is your cut point.
Example: 87cm waist + 15cm = 102cm total. Mark 102cm from the buckle end.
Step 3 — Cut cleanly in one stroke
Lay the strap flat on a cutting surface. Cut at the marked point using sharp scissors in a single clean stroke at a 90-degree angle. A clean perpendicular cut gives the neatest edge to seal. A jagged or angled cut produces an uneven sealed edge.
Step 4 — Heat-seal the cut edge
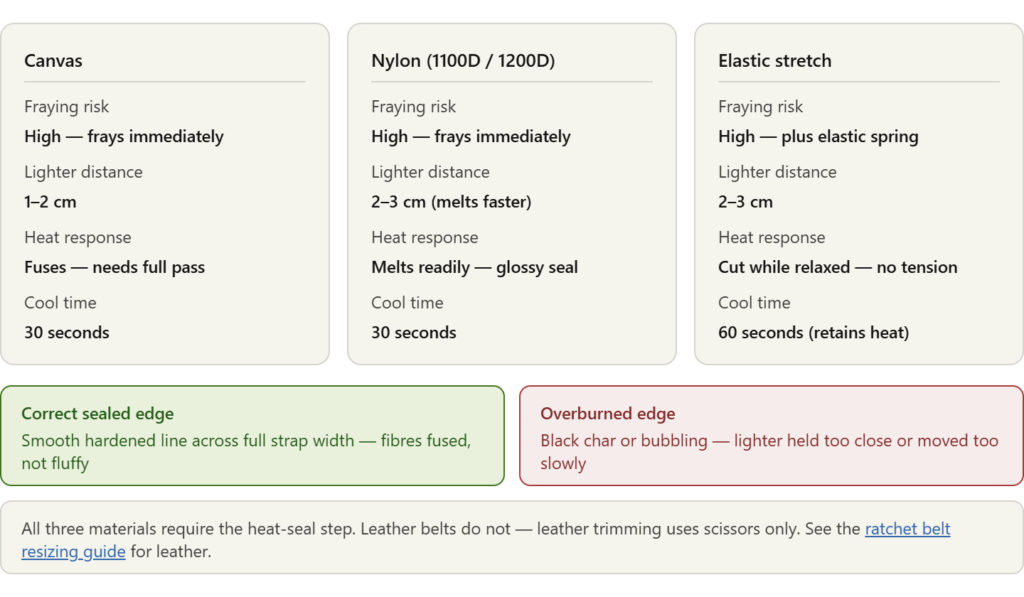
This step is essential for canvas. Hold the lighter approximately 1–2cm from the cut edge and pass the flame slowly along the full width of the strap. The goal is to briefly melt and fuse the surface fibres — not to burn, char, or ignite the material.
The correct result: the cut edge should develop a slightly hardened, fused line along the full width. The fibres are visibly melted together rather than loose and fluffy.
If the edge chars or turns black, you are holding the flame too close or moving too slowly. If the fibres do not fuse, you are holding the flame too far away or moving too quickly. Practise on the offcut before treating the strap end.
Allow to cool for 30 seconds before handling.
Step 5 — Reattach the buckle
Feed the trimmed strap back into the buckle housing and engage the clamp. Pull the buckle firmly to confirm the clamp is fully seated. The trimmed end is concealed inside the buckle housing when worn.
The process for nylon is identical to canvas. Nylon responds slightly differently to heat — it melts more readily and can bubble if the flame is held too close. The technique is the same but requires a slightly lighter touch.
Step 1 — Remove the buckle. Open the rear clamp and slide the strap out.
Step 2 — Measure your required length and mark the cut point on the back of the strap.
Step 3 — Cut cleanly at 90 degrees in one stroke.
Step 4 — Heat-seal the cut edge
Hold the lighter 2–3cm from the cut edge for nylon (slightly further than for canvas). Pass the flame along the full width in a smooth continuous motion. Nylon melts more readily than canvas — you need less heat and less dwell time.
The correct result: a smooth, slightly glossy fused edge across the full width. The fibres are sealed without bubbling or charring.
Step 5 — Allow to cool. Reattach the buckle.
Note on 1100D and 1200D nylon: Higher-denier nylon has more fibre density and requires slightly more passes to seal fully. If the first pass produces a partially sealed edge, make one additional pass rather than slowing down or moving the flame closer.
Elastic belts (stretch nylon) use the same cut-and-seal process, with one additional consideration: the elastic fibres in the strap can contract slightly after cutting, which creates an uneven cut edge if the strap is under tension when cut.
Step 1 — Remove the buckle.
Step 2 — Lay the strap flat and relaxed — no tension — before marking and cutting. Measure your required length with the strap lying flat.
Step 3 — Cut cleanly at 90 degrees. The elastic fibres should not spring back significantly if the strap is cut while relaxed.
Step 4 — Heat-seal the cut edge using the same technique as nylon. Hold the flame 2–3cm away and make one smooth pass across the full width.
Step 5 — Allow to cool fully before reattaching the buckle. Elastic fibres retain heat longer than solid nylon — give the edge 60 seconds before handling.
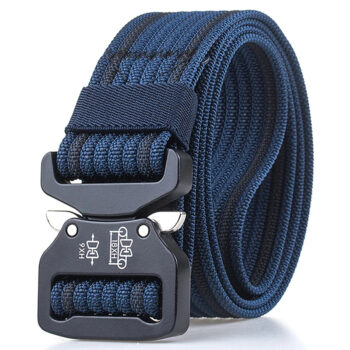
The Commando (Navy SEAL), Sky Guardian (Air Force), Ghost Squadron (Skull), and Polaris canvas belts all use the same friction-lock buckle system. The trimming process is identical across all four.
The friction-lock buckle has a rear clamp that opens by pressing the release tab. Slide the canvas strap out, trim and seal, reinsert.
One practical note: for these belts, the excess strap tail feeds through the buckle mechanism and exits the front rather than being routed through a keeper. This means a very long strap produces a visible excess tail at the front of the buckle. Trimming to a length that leaves 5–8cm of tail beyond the buckle face produces the cleanest result.
The common mistake is trimming too aggressively. Trim gradually:
You cannot add length back. Trimming in increments costs one extra minute. Cutting too short costs the strap.
Do not cut the tip end. The tip is the finished factory end. Cut here and the clean tip is gone permanently.
Do not skip the heat-seal step. Canvas and nylon will fray from the cut point within days of wear if unsealed. One pass with a lighter takes 10 seconds.
Do not cut while the strap is under tension. Lay the belt flat and relaxed before measuring and cutting — particularly for elastic belts.
Do not hold the flame in contact with the strap. A brief pass from 1–3cm distance fuses the fibres cleanly. Direct contact chars the material.
Do not machine wash immediately after trimming. Give the sealed edge 24 hours to fully harden before the first wash.
Yes — a heated cutting tool cuts and seals in one step and produces a cleaner edge than scissors-plus-lighter. If you have a hot knife or soldering iron, use it. If not, scissors and a lighter produce an adequate result.
Make one additional pass with the lighter, moving slightly more slowly. A ragged sealed edge is better than an unsealed one — the fused fibres will not unravel even if the seal is visually uneven.
Yes. Any direct flame source works. The technique is identical — pass the flame along the cut edge at 1–3cm distance without contact. A candle flame is less directional than a lighter, so move slightly more slowly.
No — one pass across the cut edge (the end face) is sufficient. The heat fuses the fibres at the cut point across the full thickness of the strap.
If the factory-trimmed edge looks clean and smooth (visibly fused), it has already been sealed. If it looks like a raw cut with visible loose fibres, seal it before first wear.

Practical belt guides, sizing tips, and exclusive offers — straight to your inbox.

Leave a comment