Most EDC setups aren’t systems. They’re collections.
A knife in a pocket. A multitool clipped somewhere. Keys loose. Phone wherever. Each item carried independently, each one competing for the same space, each one requiring a separate decision every time it’s accessed.
The result is carry that works in theory and creates friction in practice — tools that shift, stack against each other, and require hunting rather than retrieval. After a few hours, the setup feels like it needs constant management rather than disappearing into the background.
A structured EDC system solves this differently. Each item has a defined position, a consistent orientation, and a predictable access path. You stop thinking about your carry because it behaves the same way every time.
This guide covers how to build that system — from understanding what makes EDC fail to selecting each component correctly and verifying the system works before committing to daily use.
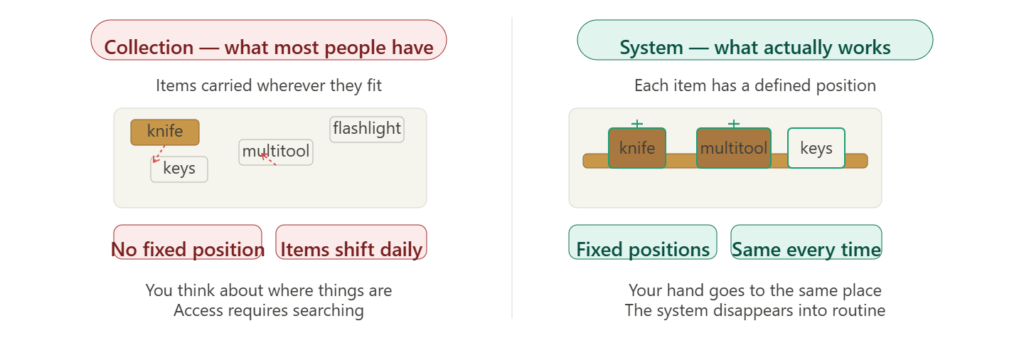
The failure pattern is almost always the same: pocket carry as the default, with belt carry added as an afterthought.
Pockets have no structure. Items placed in a pocket shift with every movement, stack against each other, and end up in unpredictable positions relative to each other and to the pocket opening. A multitool at the bottom of a pocket full of keys and a phone is technically accessible — but retrieving it under time pressure, with one hand, without looking, is a different matter.
The common response is to add clips, carabiners, and organisers to pockets. These help at the margins but don’t solve the underlying problem: pocket carry has no fixed geometry. The same item in the same pocket ends up in a different position at the end of a day than it was at the start.
Belt carry fixes the geometry problem. A belt-mounted item has a fixed position relative to the body that doesn’t change with movement, sitting, or activity. The access path — where your hand goes and what motion retrieves the item — is repeatable because the item is always in the same place.
The difference between a carry setup that disappears into your routine and one that requires constant attention is almost entirely about positional consistency.
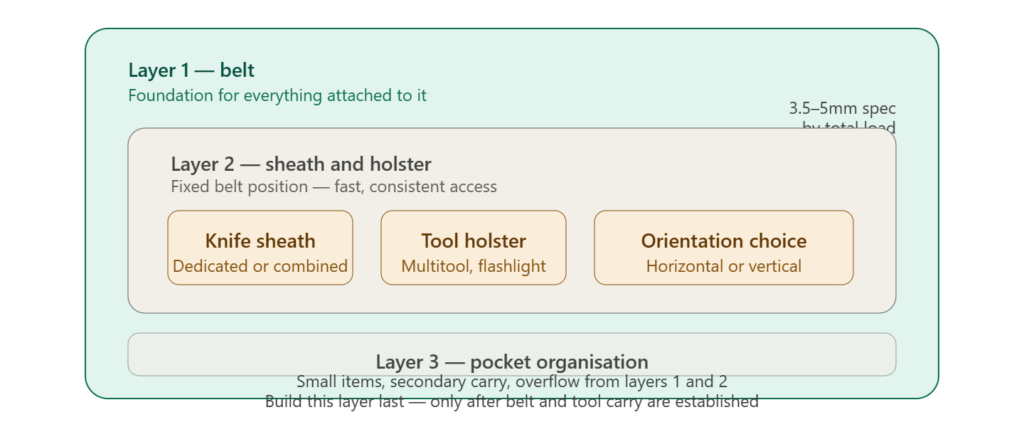
A complete EDC system has three layers, each with a specific role. The layers work together or they don’t work — a strong layer two on a weak layer one produces the same carry problems as a weak layer two.
The belt is the structural foundation of the entire system. Every item attached to the belt loads it, and the belt’s ability to maintain position under that combined load determines whether everything attached to it stays where it was positioned.
A belt that sags transfers that sag to every attached item. A belt that twists changes the orientation of every sheath and holster on it. A belt with inconsistent buckle tension produces a waistband that fits differently throughout the day, which affects comfort and the position of attached items.
The belt specification for a structured EDC system follows directly from the total load:
Under 500g combined: 3.5mm full-grain leather, 38mm width minimum. Adequate for a folding knife and a compact tool.
500g–1kg combined: 4mm full-grain single-layer leather, 38mm minimum. The range most daily carry setups occupy — knife, multitool, and one additional item.
Over 1kg combined: 4.5–5mm full-grain single-layer leather, 38mm minimum. Required for multi-slot holster systems or heavy fixed blade carry. At this load, belt construction is the primary limiting factor — a marginal belt fails regardless of what’s attached to it.
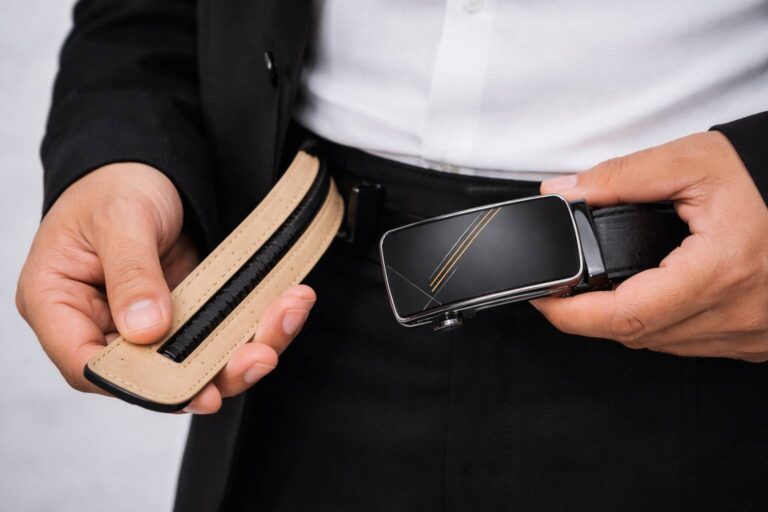
Beyond thickness and construction, the buckle mechanism matters specifically for carry. A ratchet mechanism with 0.5cm adjustment increments allows precise belt tension setting and maintains that tension consistently across a full day of movement. A pin buckle at the nearest fixed hole is either slightly too tight or slightly too loose, and that tension drifts further as the wear hole gradually enlarges under daily use. For carry setups where belt tension directly affects attached item position, this precision matters.
For a full technical breakdown of how belt construction affects carry performance, see our [guide to why belts fail with knife carry →]
Layer two removes tools from pocket carry and places them at fixed, accessible positions on the belt. The sheath or holster determines retention quality, draw consistency, and how the load of the tool transfers to the belt beneath it.
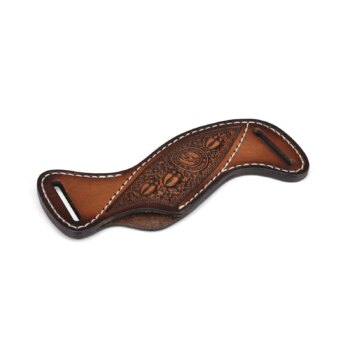
Single tool carry — dedicated sheath: If the knife is the primary carried tool and nothing else is on the belt, a dedicated knife sheath provides the best retention and lowest profile. The sheath is form-matched to the knife geometry, the welt construction holds the blade along its full length, and the attachment is purpose-built for that one tool.
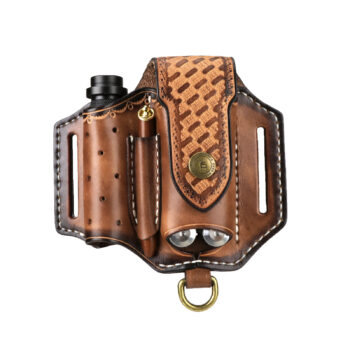
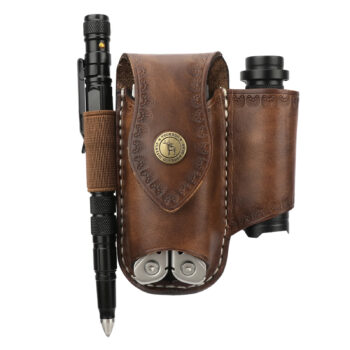
Multiple tools — holster system: When a multitool, flashlight, or other item is added alongside the knife, the decision between separate items and a combined holster becomes relevant. Separate items give better individual retention but occupy more belt space and create multiple attachment points that each require management. A combined holster simplifies the attachment to one point but provides less retention specialisation per tool.
The practical rule: if both tools are accessed with similar frequency throughout the day, a combined holster is the more practical format. If one tool is the primary item and the other is rarely accessed, dedicated carry for the primary tool and a simple secondary carrier is better.
Orientation: For predominantly seated daily use — desk work, driving, extended seated periods — horizontal carry is the correct default. A horizontal sheath sits along the belt line and creates no protrusion below it, which means no thigh pressure during seated wear. Vertical carry suits active outdoor use where draw speed matters more than seated comfort.
For detailed guidance on sheath construction variables, attachment geometry, and how to match sheath to belt, see our [leather knife sheaths for belt carry guide →]
For holster selection by use case and tool weight, see our [belt holsters for multitool carry guide →]
Not everything belongs on the belt. Small items — keys, compact tools, cards, earbuds — that don’t require the access speed or positional consistency of belt carry are better managed through pocket organisation.
The goal of pocket organisation in a structured system is the same as belt carry: defined position, consistent orientation, predictable access. A pocket organiser achieves this by dividing pocket space into fixed slots. Items don’t stack or shift because each has its own position.
The common failure of pocket organisers is overloading them. An organiser with eight slots carrying eight items has less access speed than a pocket with three items loose, because retrieving any one item from a dense organiser requires navigating around all the others. The correct use of a pocket organiser is carrying fewer items at fixed positions, not more items in a smaller footprint.
Layer three exists to handle overflow from the first two layers — items too small or too light for belt carry, but important enough to carry consistently. It doesn’t replace layers one and two.
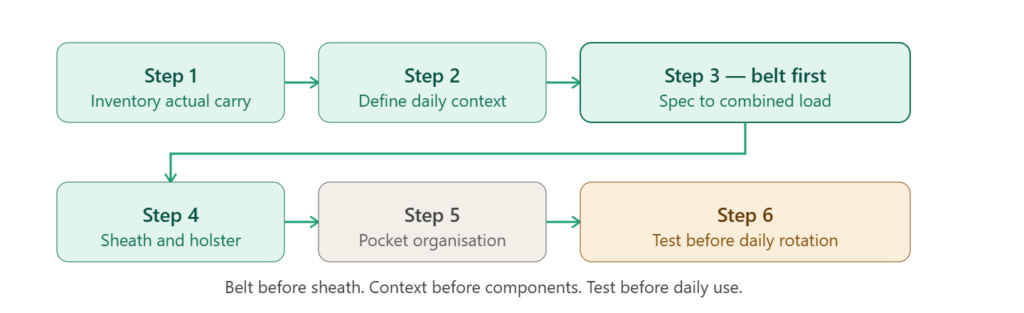
List everything you carry on a typical day. Not what you think you should carry — what you actually carry. Include frequency of access: how many times per day does each item come out?
Items accessed multiple times per day are belt carry candidates. Items accessed once a day or less are pocket carry candidates. Items rarely accessed can be left out of the daily carry system entirely.
This inventory drives everything that follows. A system built around what you think you should carry rather than what you actually carry will be abandoned within a week.
Where do you spend the majority of your time?
Predominantly seated: desk, vehicle, meetings. Horizontal belt carry for all knives and tools. Ratchet belt for consistent tension during sit-stand cycles.
Predominantly active: on your feet, outdoor, physical work. Vertical carry with two-point attachment for frequently accessed tools. Adequate belt for combined carry load.
Mixed: both seated and active in the same day. Horizontal default with adjustable orientation capability, or a carry setup that works adequately in both contexts.
This context definition determines orientation choice and drives belt specification.
Specify and acquire the belt before any sheath or holster. Calculate the combined weight of everything you intend to carry on the belt — every item, fully loaded. Match that to the belt specification table above.
This step is the one most people skip. The result is a system where the sheath and holster are well-chosen but the belt underneath them fails, producing the sag, twist, and migration that makes carry feel unreliable.
Select sheaths and holsters based on:
For a complete guide to building the knife carry component of this layer, see our [knife carry systems guide →]
Once belt carry is established, identify what remains in pockets and whether it benefits from organisation. If the pocket contents are consistent and accessed regularly, an organiser adds value. If pocket contents vary day to day, an organiser adds friction rather than removing it.
Before the system enters daily rotation, run three verification tests:
Positioning test: Access each belt-mounted item five times from a standing position. Each draw should require the same hand position and the same effort. Any inconsistency indicates a sheath rotating at a single-point attachment or a belt too soft to hold position.
Seated test: Sit at a desk and in a vehicle with the complete system. Any pressure point indicates a vertical sheath that needs to move to horizontal, or a belt item positioned too far forward for seated wear.
Movement test: Walk briskly for five minutes. Everything should remain in the position it started in. Migration indicates either a belt that’s too soft or a loop-to-belt width mismatch introducing play at the attachment.
If the system passes all three tests, it’s ready for daily use. If any test fails, identify the component causing the failure and address it before committing to a full day of wear.
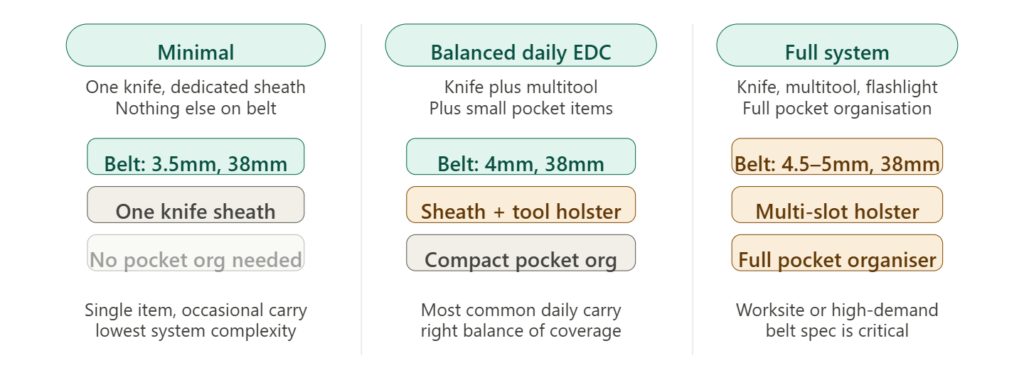
Minimal setup: One knife in a dedicated sheath, structurally adequate belt. No holster, no pocket organiser. For users who carry one tool reliably and nothing else.
Balanced daily EDC: Knife plus multitool, carried as separate items or combined holster, with a pocket organiser for smaller items.
Full system: Knife, multitool, flashlight, and possibly a phone holster, on an adequate belt with full pocket organisation.
The system that works is the one matched to what you actually carry at the load and frequency that reflects your real daily routine — not the most capable configuration possible.
Choosing the belt last. The most common mistake and the direct cause of most carry system failures. The belt is the foundation. Everything else depends on it.
Carrying everything on the belt. A belt loaded with six items is structurally overloaded unless the belt specification accounts for the combined weight. Belt carry should be reserved for items that genuinely benefit from fixed position and fast access.
Using pocket carry as a backup for belt items. If an item needs to be on the belt, carry it there consistently. Moving it to a pocket when circumstances change removes it from the structured system and introduces the inconsistency the system was built to eliminate.
Building for the exceptional day rather than the typical day. A carry system designed around the most demanding day you ever have will be burdensome on the average day and will eventually be abandoned. Build for the average day and supplement for the exception.
Not testing before daily rotation. A system that passes shop testing and fails in actual daily use is extremely common. The three verification tests exist precisely because shop conditions don’t reproduce the cumulative effects of a full day of wear.
As few as necessary. Each additional item on the belt adds load, occupies belt space, and introduces another potential failure point. The correct number is the number of items that genuinely benefit from fixed belt position and are accessed often enough to justify belt carry. For most daily carry users, this is one to three items — a knife, possibly a multitool, and occasionally a flashlight or phone holster.
Yes, within limits. Belt quality is the one component where cutting cost consistently produces system failure. A budget sheath on a quality belt works better than a quality sheath on a budget belt. The belt specification isn’t negotiable — get the thickness and construction right even if it means deferring other purchases.
If you have to think about where each item is when you reach for it, it’s a collection. If your hand goes to the same place every time and the item is always there, it’s a system. The test is the absence of conscious management — a working system disappears into your routine.
Not necessarily. Distributing items across the waistband — dominant side knife, non-dominant side secondary tool — balances the load and prevents the compounding failure that comes from multiple heavy items on one belt section. The practical constraint is draw preference: items you access quickly should be on the dominant side; items accessed deliberately can go anywhere.
When your daily context changes significantly — new job, new routine, seasonal clothing changes — the system should be reassessed against the new context. A carry setup optimised for an active outdoor job doesn’t translate automatically to a desk-based role. The reassessment follows the same sequence: redefine context, check belt spec against new load, verify sheath and holster choices still match orientation and access requirements.
HoldForm builds carry belts, knife sheaths, and holster systems to declared construction specifications. Every product page lists leather grade, thickness, attachment type, and loop width — because a carry system built to spec outperforms one assembled from unverified components.
[View carry belt range →] [Leather knife sheaths for belt carry →] [Belt holsters for multitool carry →] [Knife carry systems: how to build a setup that holds position →] [Why most belts fail with knife carry →][Leather knife sheaths for belt carry →] [Leather belt holsters for multitool carry →] [Horizontal vs vertical knife carry →]

Practical belt guides, sizing tips, and exclusive offers — straight to your inbox.


Leave a comment